Confessions of a Prop Junkie had asked us if we would like to give a tip to photographers. Hmmm… Niña and I thought long and hard. We knew we wanted to show something Photoshop related. Then on the phone, we had an ‘Ah-HA’ moment. Every photographer wants to know about head swapping! It’s such a great tool to know how to do! You can see the blog post on Confessions of a Prop Junkie HERE. Make sure you check out the blog’s other tips that photographers have shared!
We will also show you the tutorial on how to head swap in this post, as well as other examples! 🙂 These are the kind of tips we hope to post more of on here…so stay tuned for future tips!
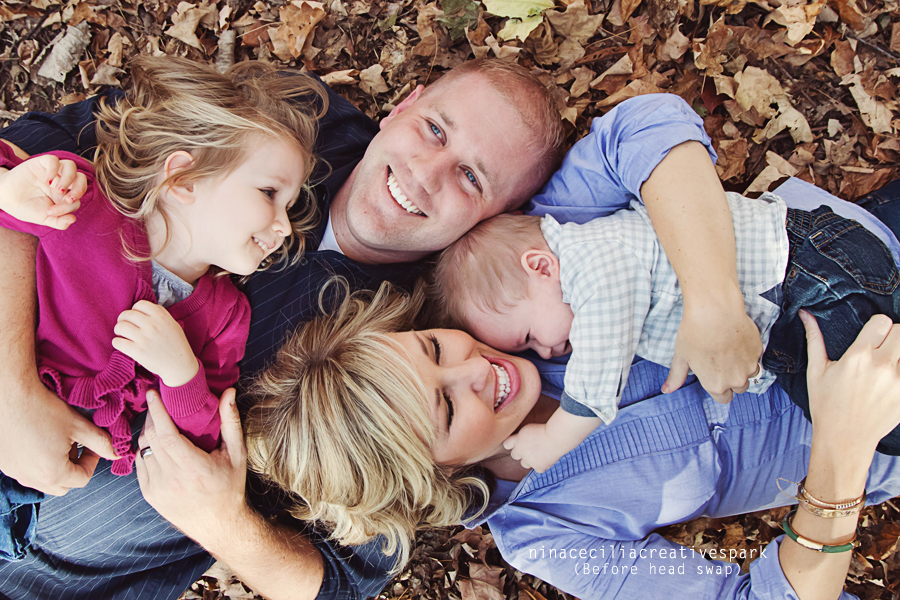
Head swapping can sure be a pain in the butt but once you ‘master’ it, it can be very rewarding seeing the final image as how you pictured it! As you may have experienced it’s hard getting everybody looking at you at the same time or a kid wanting to look everywhere else except the camera. Sometimes it’s just the eyes, that we swap. Most of our clients don’t even know that we had done a head swap for their pictures! If they don’t even notice…you know you did a great job.!
Here’s just an example of how we do our head swap.
The image above shows you what 2 images I’m using for my head swap. One image is the main picture and the other image is the head that you want to use.
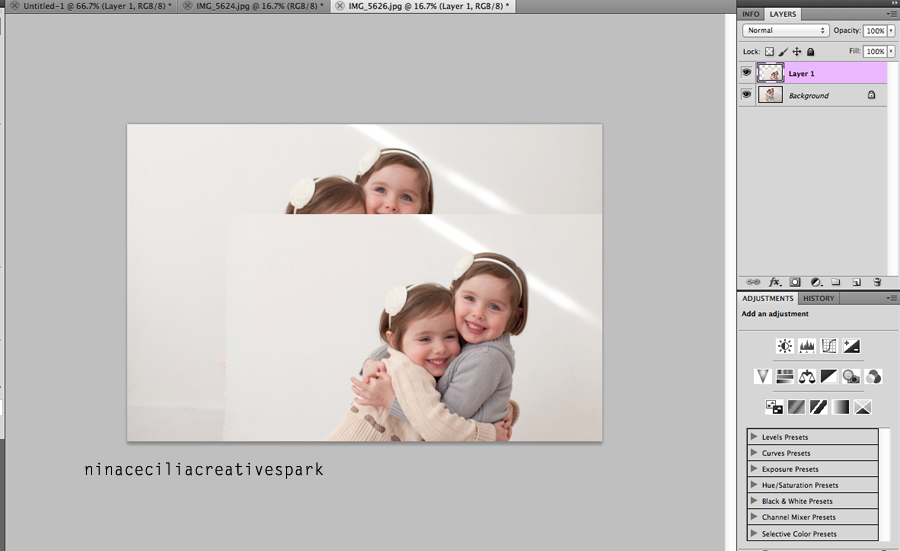
So let’s start! What you need to do 1st is open the 2 images in Photoshop. Then drag the image with the head you want into the main picture. As you can see in my layers, layer 1 is the image I dragged in.
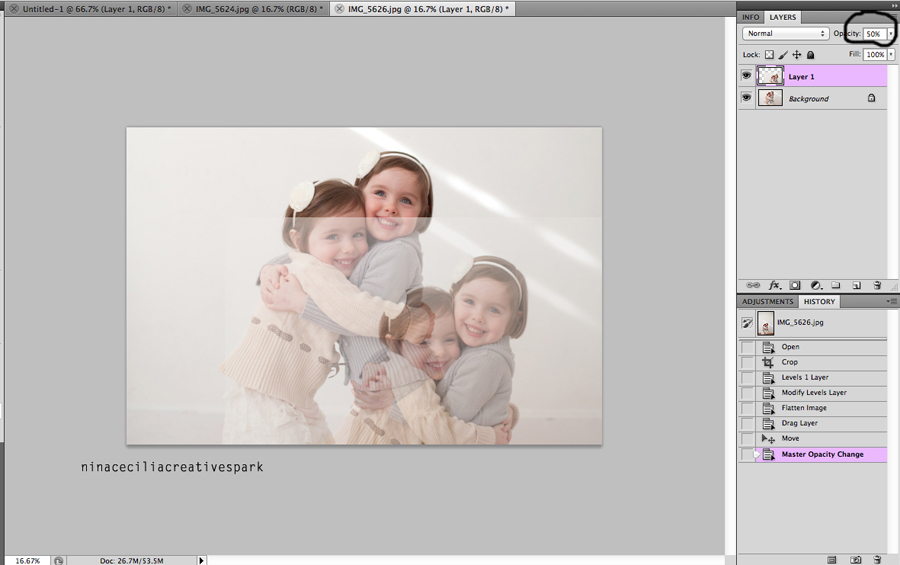
Change “layer 1” opacity to 50%. Changing the opacity lets you see where you are putting the ‘new face’ onto the ‘old face.’
Move “layer 1” over the ‘old face’ and match it as best as you can so the only thing you’ll have to change is the face and not the clothes/surrounding near the face.

Change “layer 1” back to 100%. Then add a “vector mask.”
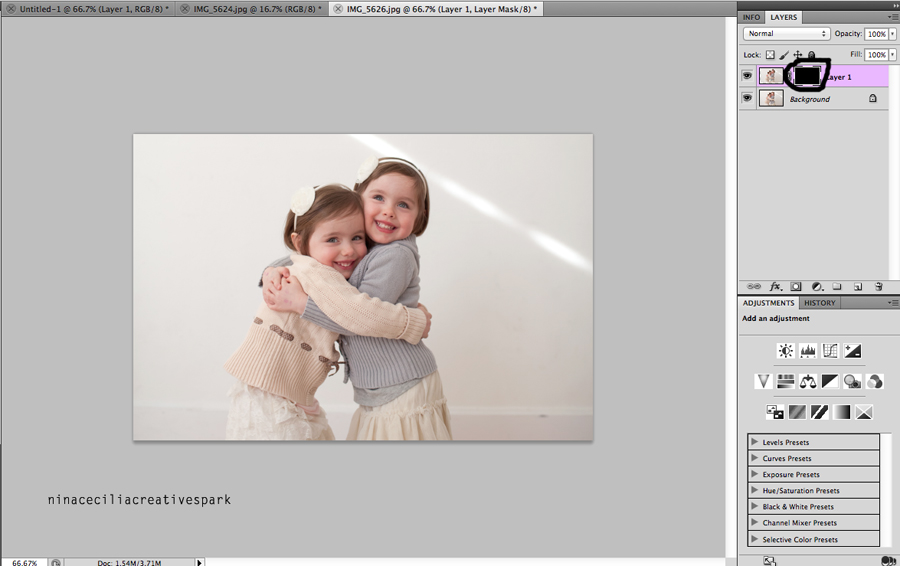
Click on the white box of “layer 1”. Then hit “command+I” (that’s an upper case i). That white box will now be black. Once you do that your image with the head you want to use is hidden.
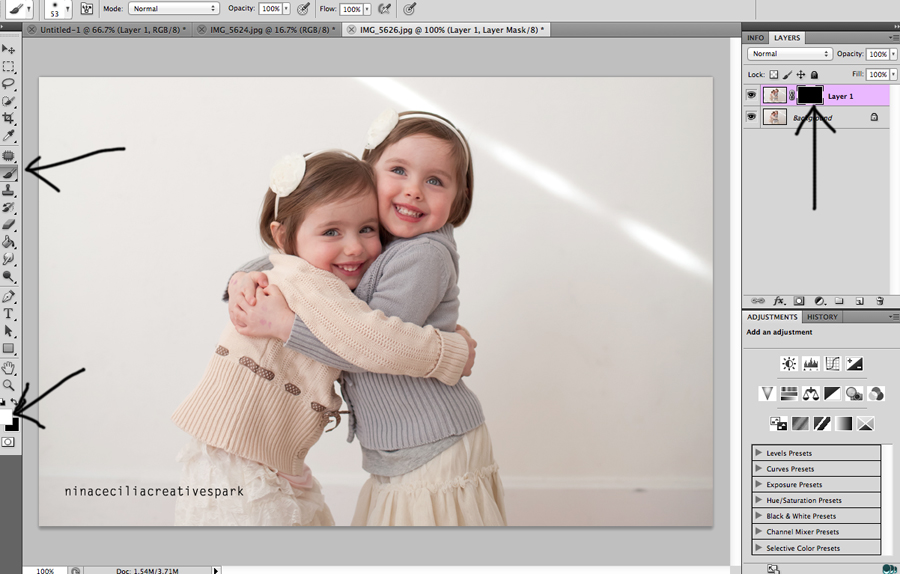
We will start painting in the head. First make sure you are using your brush (everything should be at 100%), have the white layer for the brush, and have the box in “layer 1” as black. Put your brush on the head you are swapping and start brushing away the old face and your new face will ‘magically’ appear! 🙂
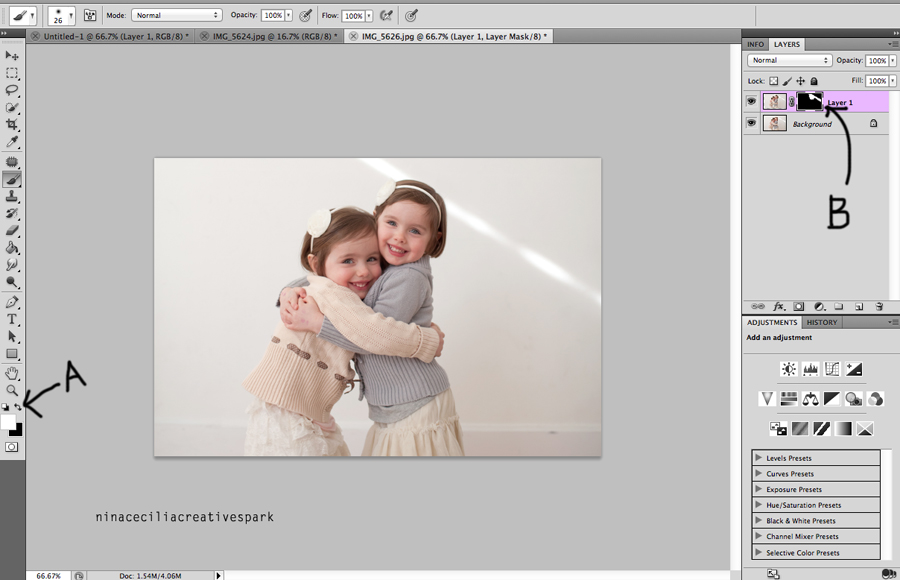
Here’s is what it looks like after I brushed in the new face. If you brushed too much, switch to the black layer in area “A”. You can always go back and forth to the white and black layer to get it perfect. As you can see in area “B”, the white area is what I had brushed into the main image. **Make sure you zoom in so you can make sure that clothes/hair are lining up.
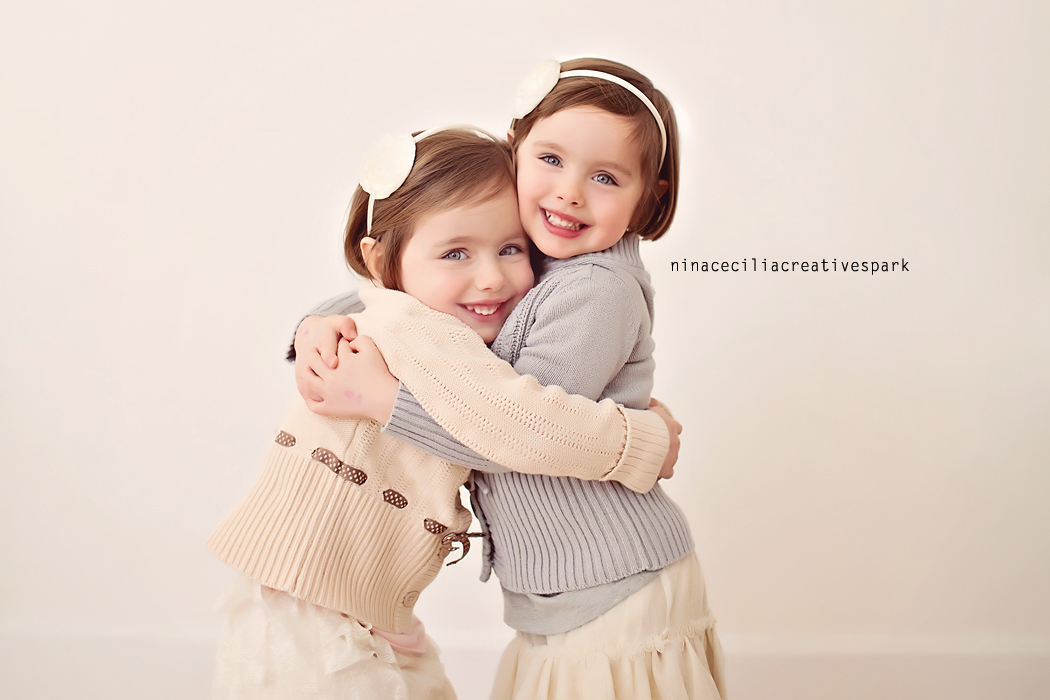
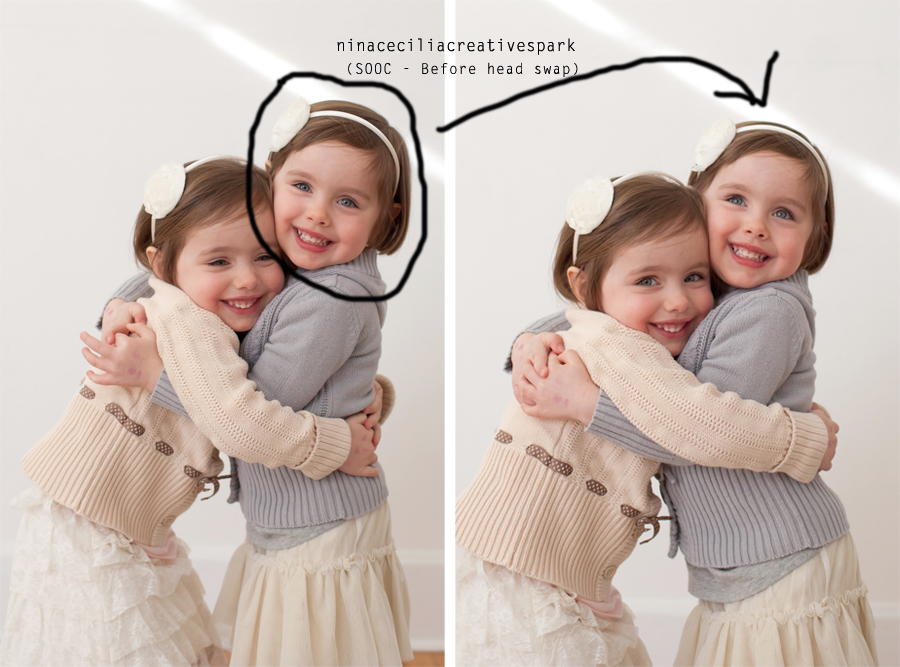
Here’s the finished product! Now that was easy…right?! 😉
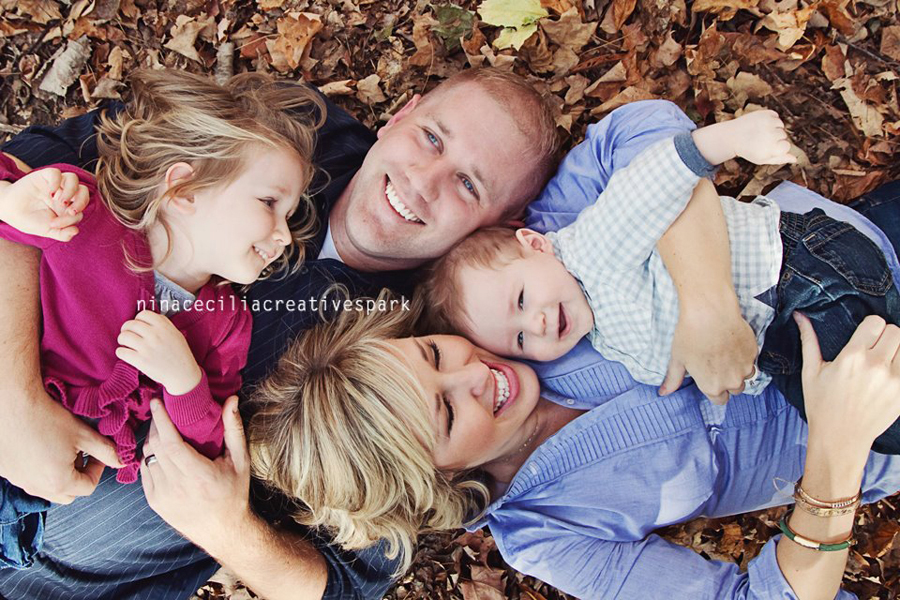
Here’s a few more examples of head swapping!
Example 1:
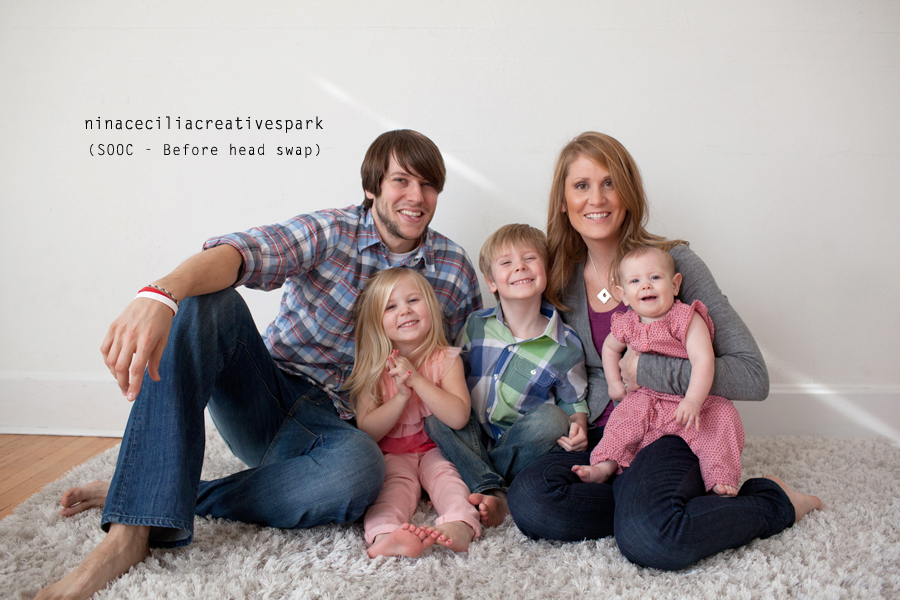
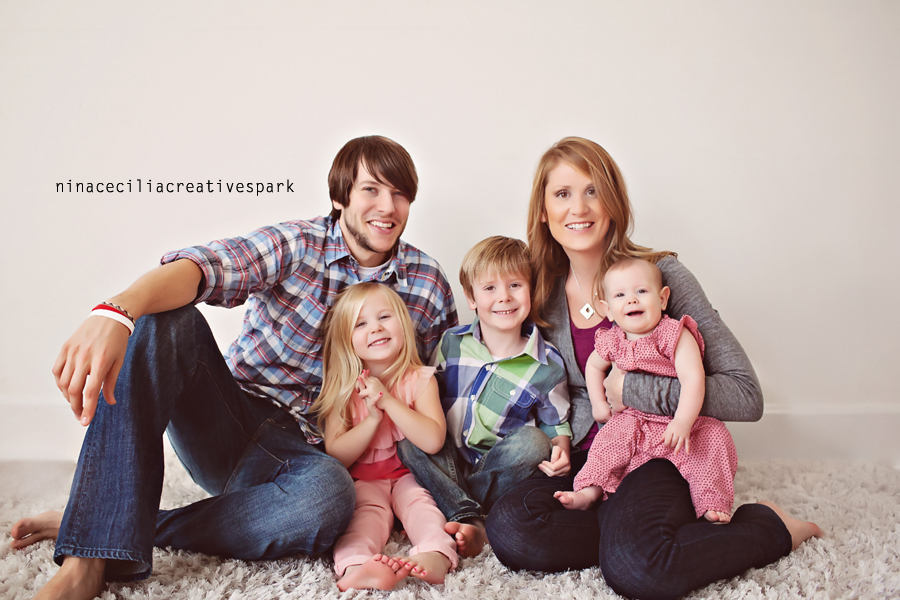
Example 2: