When I first saw the original (straight out of the camera) image, I knew this was a great image except that cigarette by the dog 😉
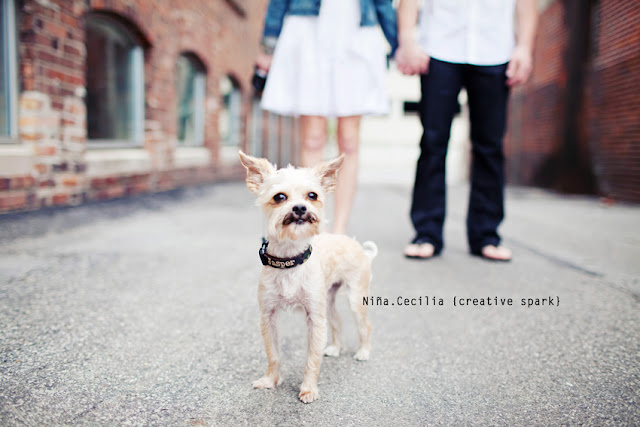
Once I got it edited and got rid of the cigarette on the ground, I thought it was a good image, but I didn’t like how he only had one ear!…his other ear was too far back that you couldn’t see it from the angle I was photographing.
…so I added his ear on there and here’s the final image:
Thought I would share how I did this:
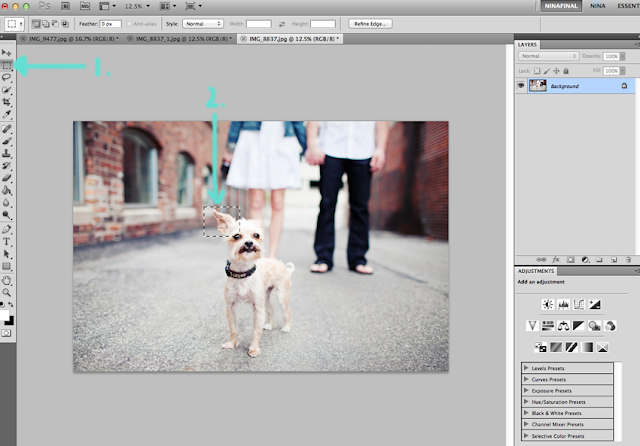
1. Select the marquee tool
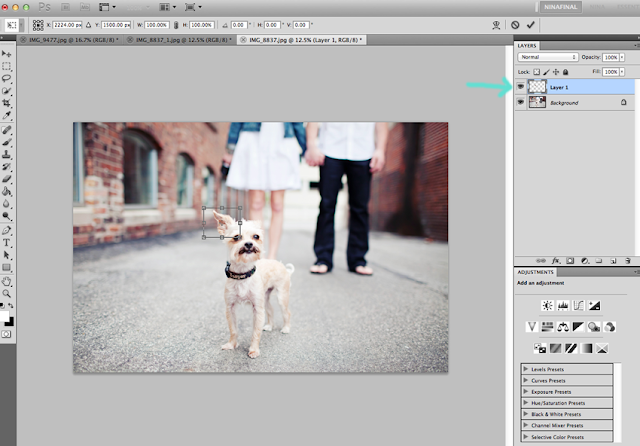
2. Using the marquee tool, I selected the ear that I wanted to copy
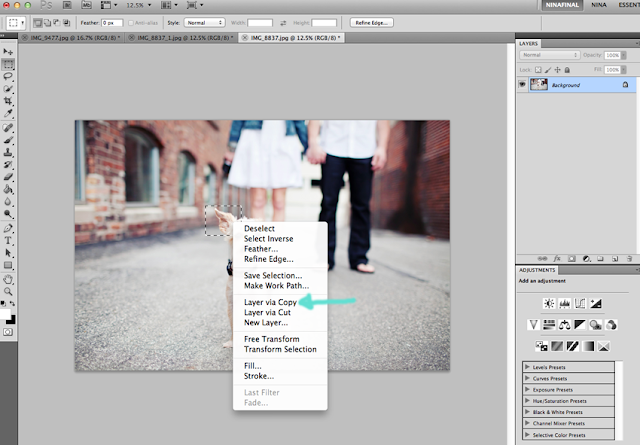
3. Right click on the selected area and select ‘layer via copy’
(once you do this, it will create a new layer with this selected area)
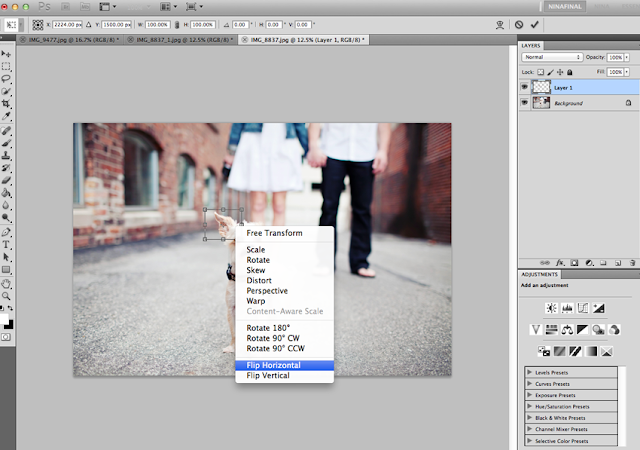
4. Make sure you have the layer selected, and then hit ‘command T’ (this is the shortcut for macs, but I think it’s ‘ctrl T’ for other computers)
Once you do this, it will show the free transform tool as shown around the dog’s ear.
5. Right click on the selected area, and select ‘flip horizontal’
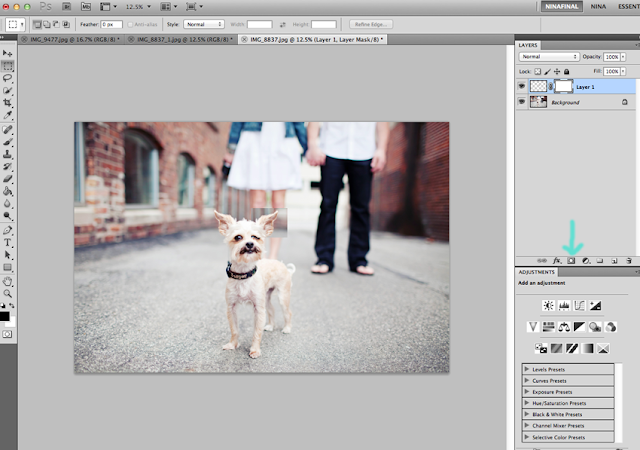
6. Then just move the ear where you think it fits. When you’re done, click enter.
7. Once you click enter, this is what you’ll see. Then I added a layer mask by clicking on the icon as shown below.
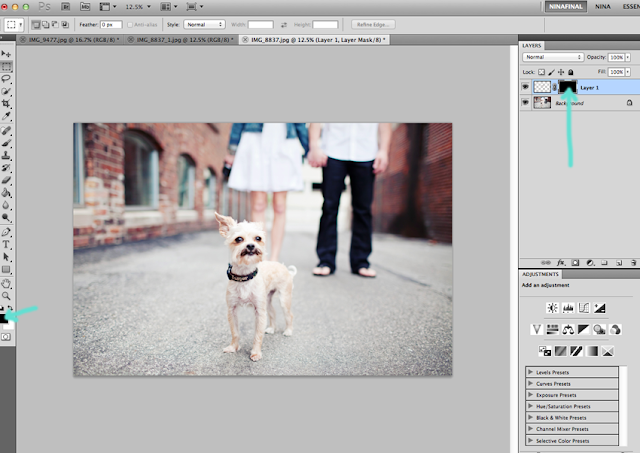
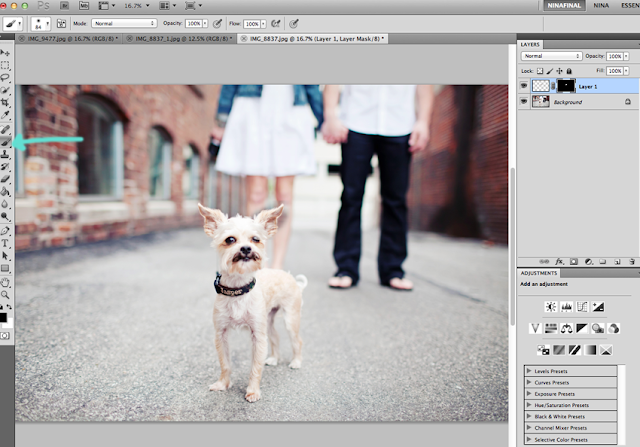
8. Then I inverted the layer mask by hitting ‘command I’ (it could be ‘ctrl I’ for other computers)
Once you do this, it will show a black box.
9. Then use your brush tool (make sure it’s the white brush) to brush on the ear onto the picture. Switch back and forth between the black and white brush if you’ve brushed too much or would like to get the original image back.
and again, here’s the final image…now wasn’t that easy? 😉



Jen Pope
Thats Awesome!